Night Sky

We are quite fortunate living in the Rainy River District with near perfect conditions in most areas for viewing the night sky. The only major sources of light are Atikokan and Fort Frances, and almost everywhere else we have dark skies. Recently, the Boundary Waters Canoe Area Widerness joined just 12 other places in the world to receive a prestigious designation as a “Dark Sky Sanctuary.” The recognition means it it is one of the most remote (and darkest) places in the world. Quetico Provincial Park is  currently considering working on applications for Dark Sky certification.

This section is our small attempt to introduce the night sky our members. Of course, there are far better sites with much more detailed information than this site could provide, but we hope it will start you on your path to viewing the night sky.

We reached out to Fred Pugh, a night sky enthusiast who has spent considerable time finding his way among the stars. His has been a long learning curve, which will considerably shorten ours, for those of us who wish to pursue this further. I hope you will enjoy this and future articles from Fred. For additional articles check out the various newsletters.  We hope to include one or two stories in each issue.  Enjoy the ride!

“I wrote this article about my experience in astronomy-astrophotography. I learned the hard way because I had no guidance along the way but fortunately it worked out for me. However there are better and easier ways for beginners to get started. Most beginners who follow a path like I did would give up in frustration  I would like to write a follow up article or articles on a beginners approach into astronomy or astrophotography from naked eye to binoculars and finally telescopes, cameras and processing. I think it would be a good idea to briefly discuss the pluses and minuses of various types of equipment for beginners to get started with. This will probably turn into several articles”. 

MY JOURNEY INTO ASTRONOMY AND ASTROPHOTOGRAPHY

Article and photos by Fred Pugh

I became interested in astronomy and all things related to space at a very young age. Some of my earliest pre school memories are about playing with rocket ships and counting down to a blastoff. My school years were through the1960’s, so I grew up with the space race and of course Star Trek. Anyone who asked me what I wanted to be when I grew up always got the same answer, “an astronaut”. Of course things did not turn out that way but my dream job today would still be an astronaut. The famous Canadian astronaut Chris Hadfield claims that Star Trek was a major influence in his career. Many other astronauts, astronomers, etc make the same claim. The race to the moon only added fuel to the fire within. I was glued to the television for every launch and subsequent coverage leading up to the 1969 moon landing, all the while dreaming that I was there with them. In my opinion the moon landing is still the single greatest achievement of the human race. 

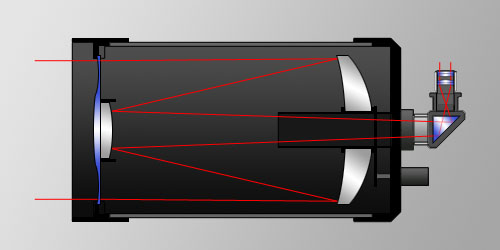
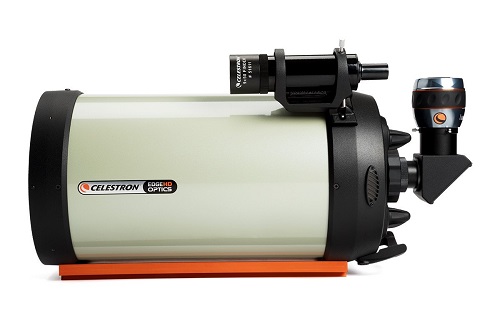
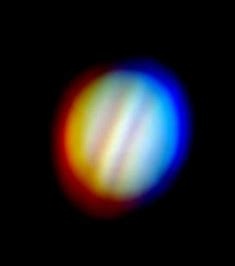
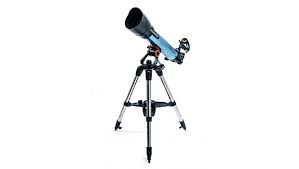
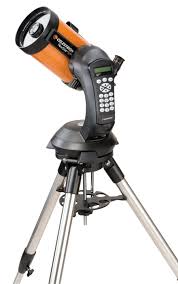
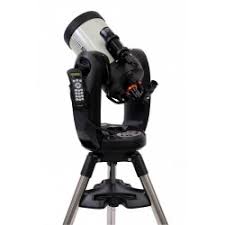
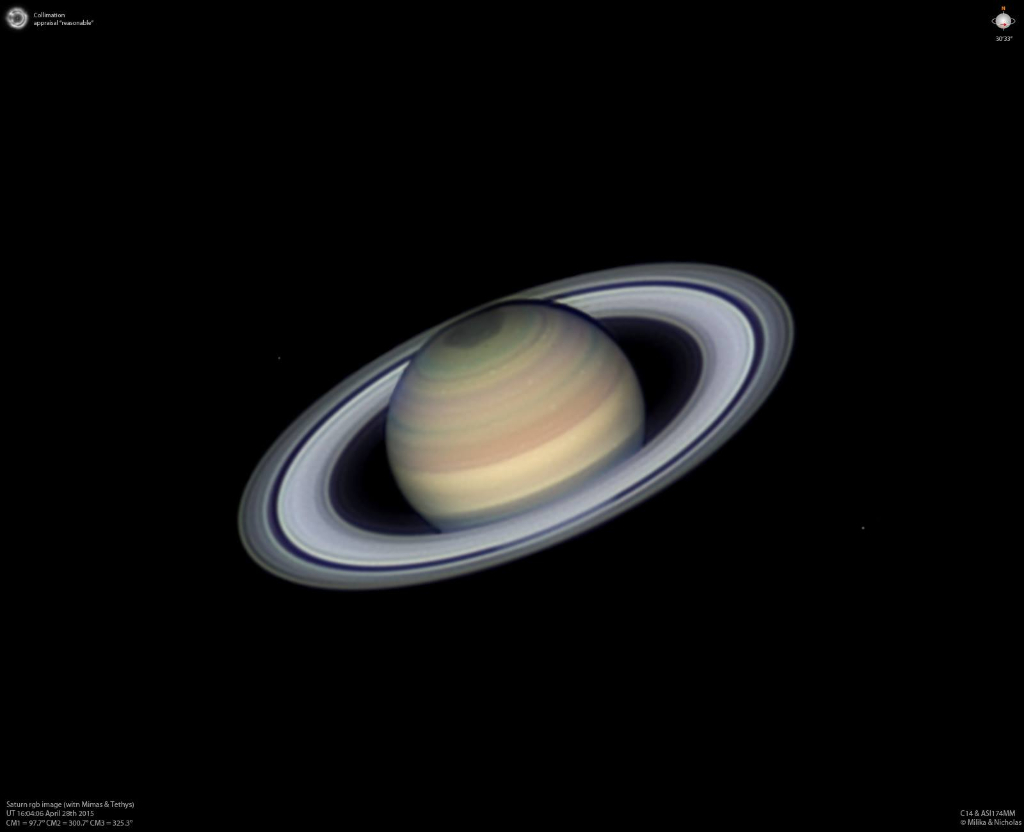
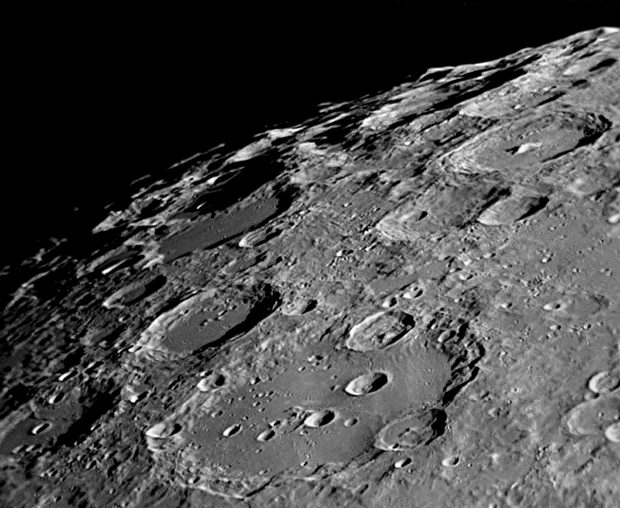
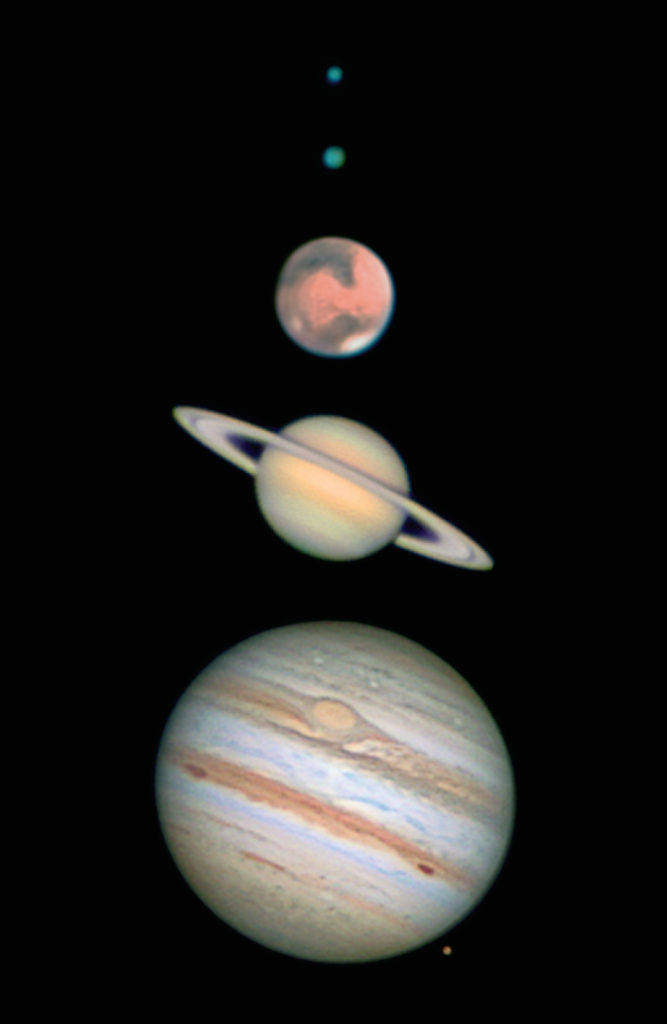
Fast forward to 1985 and family life, work, etc. I read an article in the newspaper about a new startup company selling telescopes for astronomy. These telescopes were supposed to be a breakthrough into the amateur astronomy market, claiming that they had found a way to mass produce high quality mirrors for Schmidt Cassegrain telescopes. They were still not cheap but with a little budgeting, I ordered an 8 inch Schmidt Cassegrain fork mounted telescope with a tracking mount. At the time I had no idea what I was ordering but luckily it was one of the best purchases of my life. The first time I looked into this telescope and pointed it at the moon, I thought I was going down for a landing. All of a sudden I was the astronaut that I always wanted to be. Next I pointed it at Jupiter and could not believe all the detail that was visible. The planet was covered with ribbons of different color with finer detail within the ribbons. The four largest moons were very obvious and I could even see their positions changing within a few minutes as they circled around the giant planet. The best part of the night however was to come when I swung the big scope toward Saturn and the planet with it’s beautiful rings came into focus. I never expected to have a view like this. I will always remember when my daughter saw Saturn for the first time she looked at me and said, dad that’s not real. She thought it was some fake projection and commented that it looked like a cartoon.

Needless to say my interest in the night sky had been re-kindled but at this time in 1985 I really did not know the sky. I knew a few of the major constellations but not much more than that. I did not know how to find any of the Messier objects and so was lost after looking at the major planets. The computerized telescope mounts of today are so good that you do not even need to learn the sky. You can just tell it what you would like to look at and the telescope will slew to the object and track it as the Earth turns. The computerized mounts in 1985 would only track an object as the Earth turns but you had to find the object yourself first. This meant I was forced to learn the sky, how to read sky charts and how to find objects. Many nights were spent sweeping a small area of the sky just trying to find one or two of the objects on my list for the night. Some nights went by without being able to find any of the objects on my list so I would have to resort to looking at some my favorite old standbys instead of finding something new.

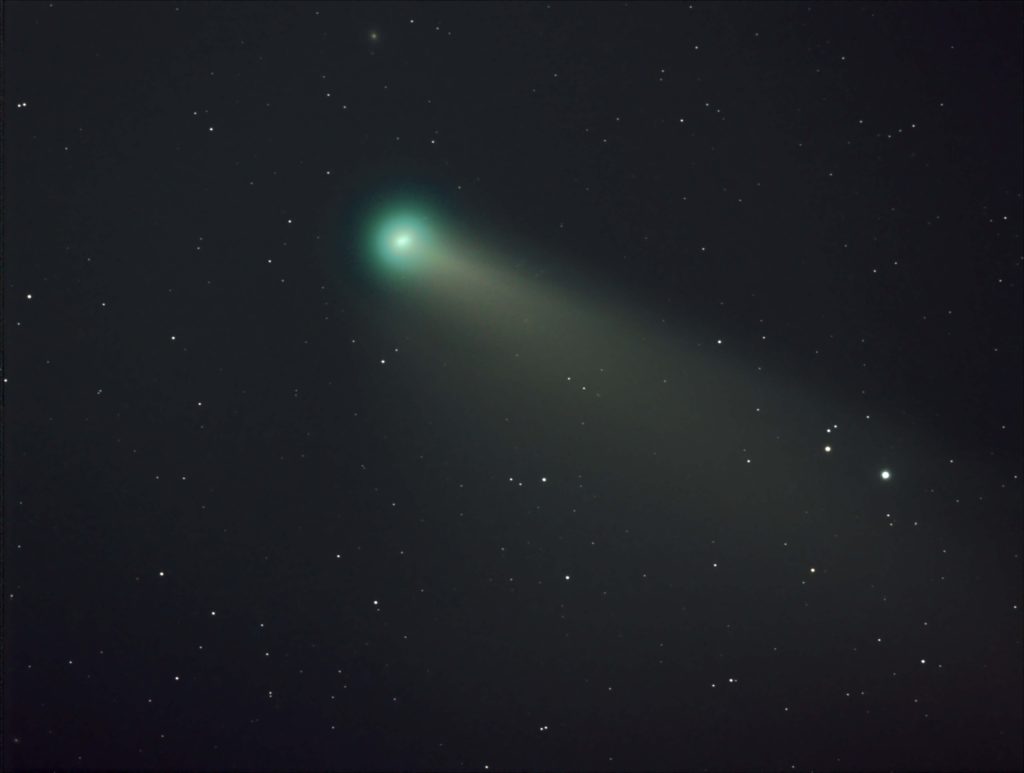
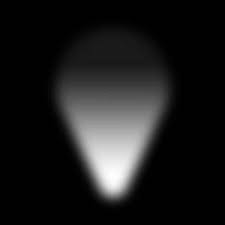
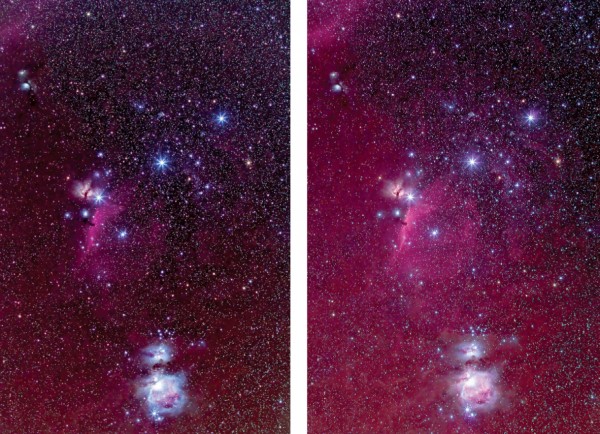
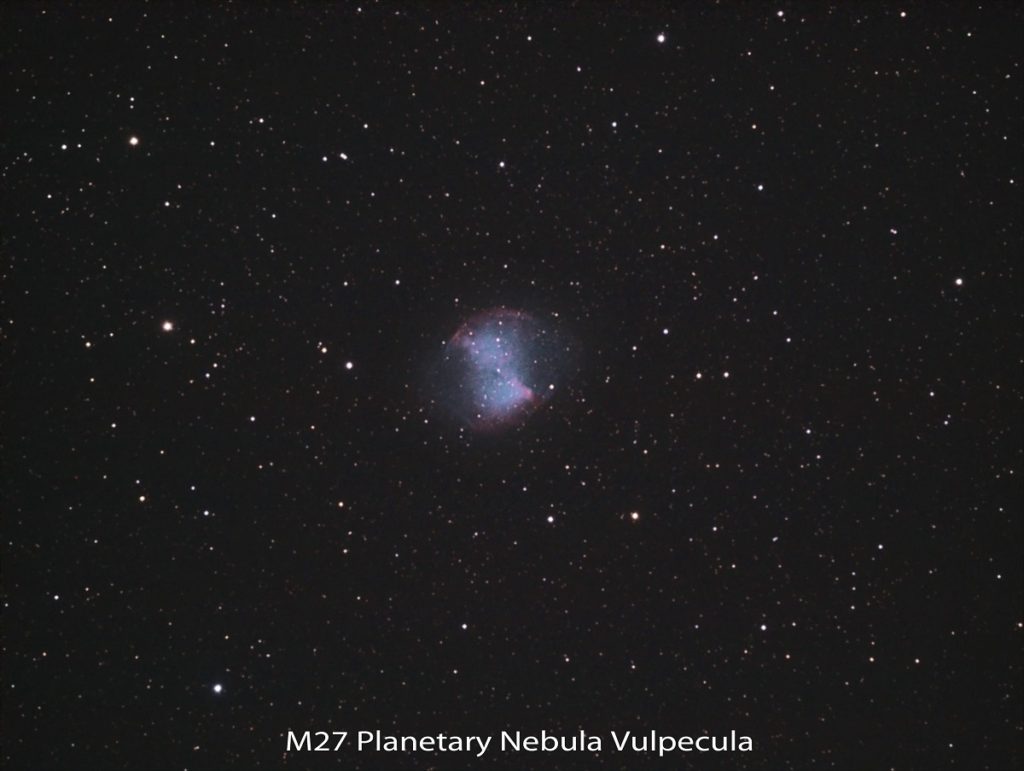
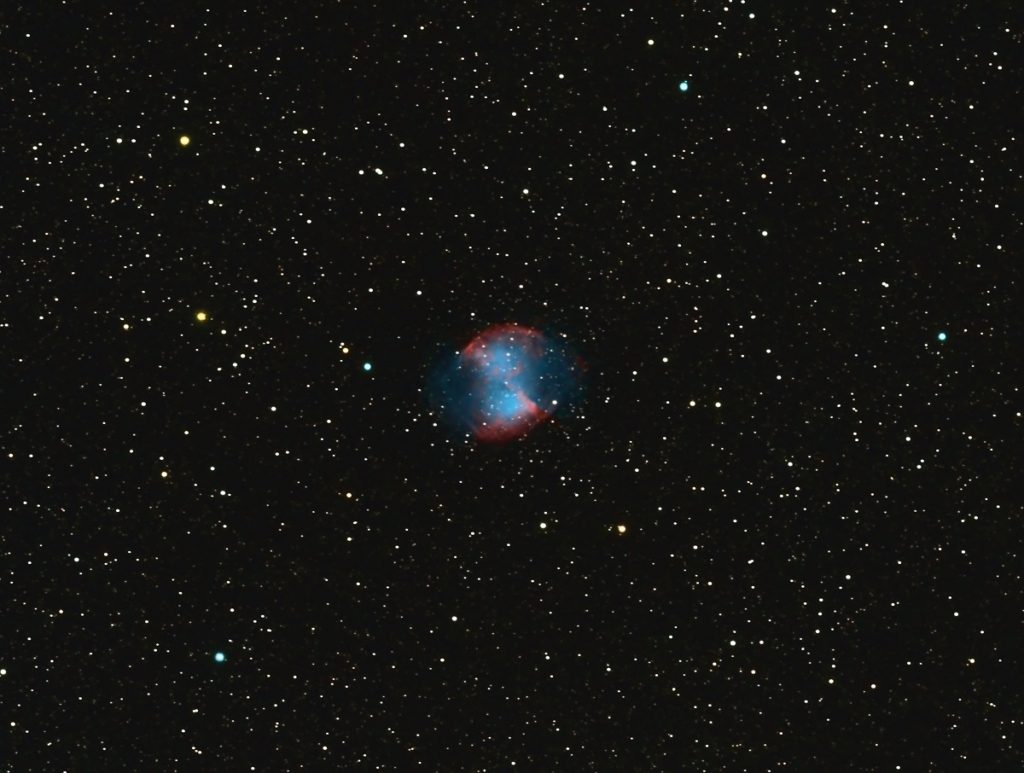
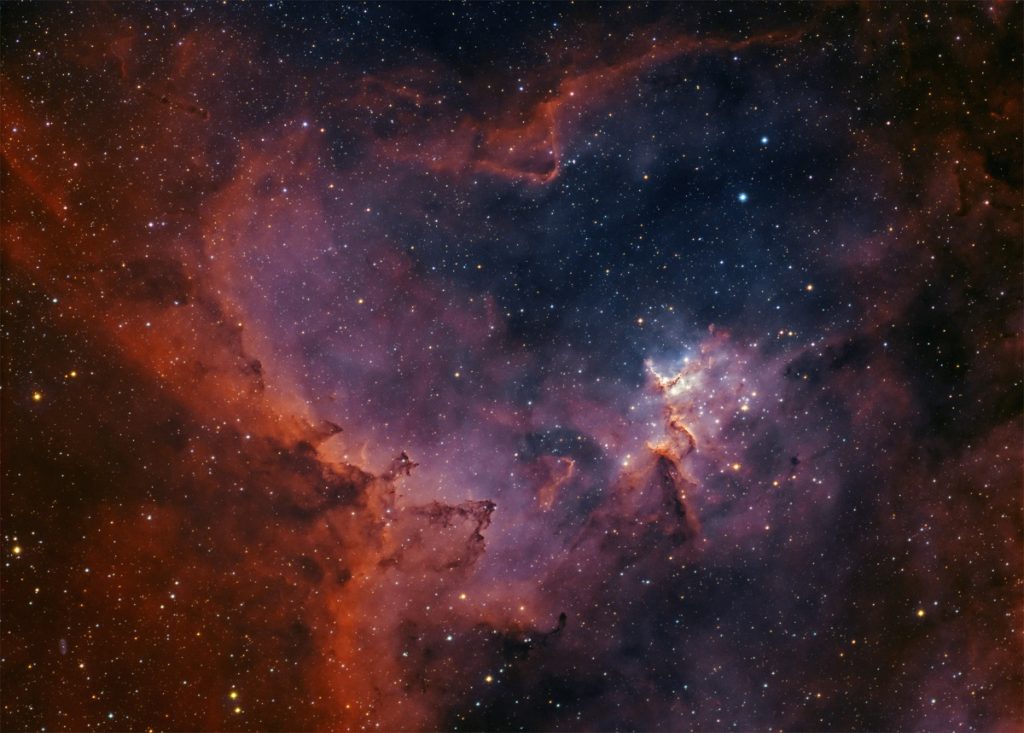
The Messier objects are generally fairly bright and thus easier to find so I spent the next few years finding most of the Messier objects that were visible and just a few of the NGC objects (New General Catalogue). Some of the Messier objects and most of the NGC catalogue are very faint so when looking into the eyepiece of a telescope all you may see is a very dim fuzzy patch and sometimes you cannot see anything at all. I eventually tired of looking at the same objects so the telescope was relegated to the closet for a while only bringing it out on rare occasions like the passing of comets Hyakutake and Hale Bopp 1996-1998. After the comets had come and gone I was sorry that I had not gotten a single picture of them so I decided to look into an SLR film camera that I could mount onto the telescope (yes film cameras were still popular and better then). I bought a used Olympus OM-1 and an adapter to mount it to the telescope and for the next while I took some great photos of the moon and not so great photos of Jupiter and Saturn, but my interest was returning. One night in 2003 I pointed the telescope and camera at M42 the Orion Nebula and snapped a few shots on slide film. The pictures were poorly guided so my stars looked more like footballs than stars and underexposed but the nebula was clearly visible.This was the first time I had tried to photograph a deep space object and it was enough to get me thinking. Unfortunately my work was very busy and I had to spend 3 years working in Houston Texas so my telescope went back to its hiding place in the closet for a few more years.

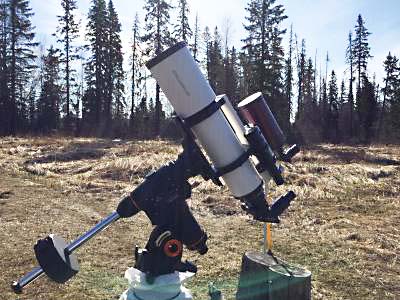
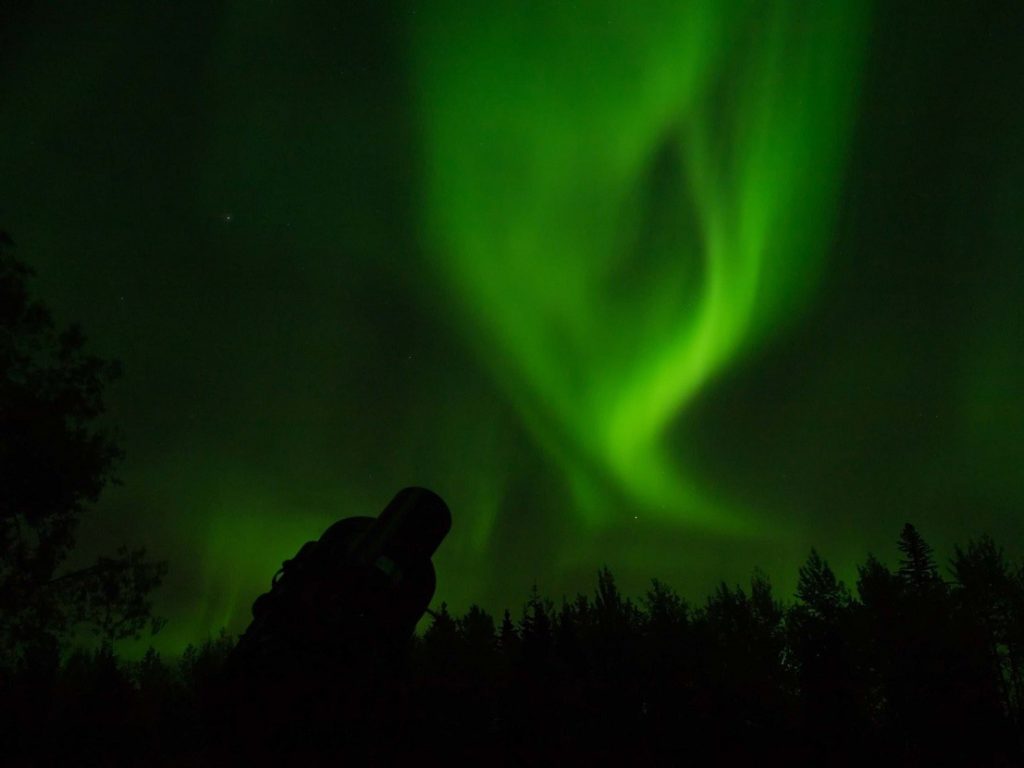
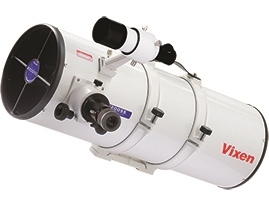
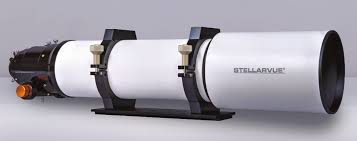
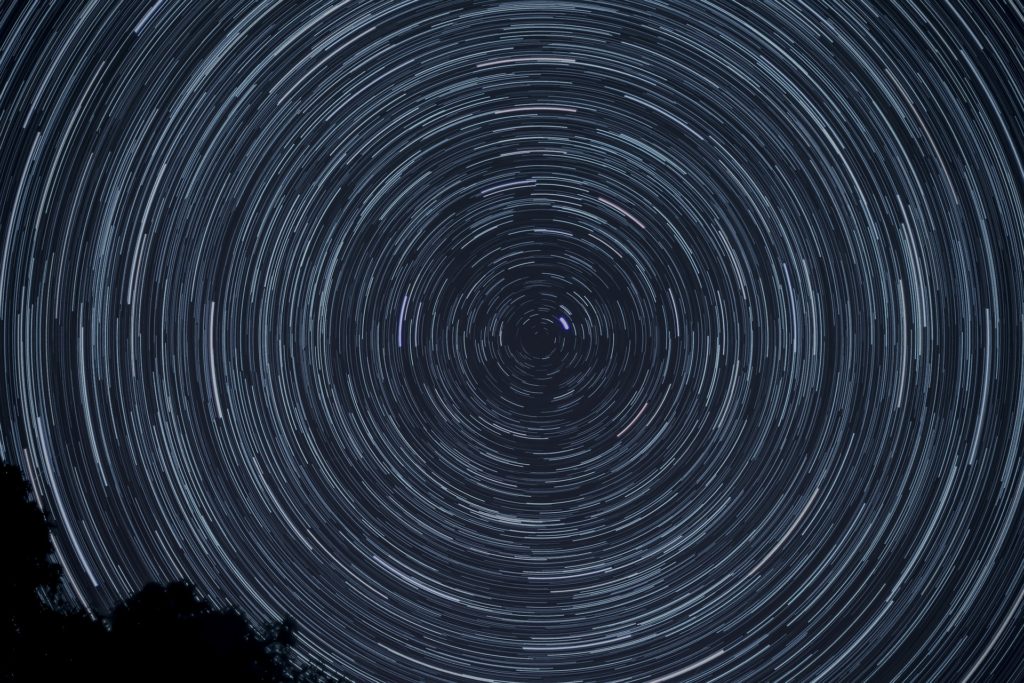
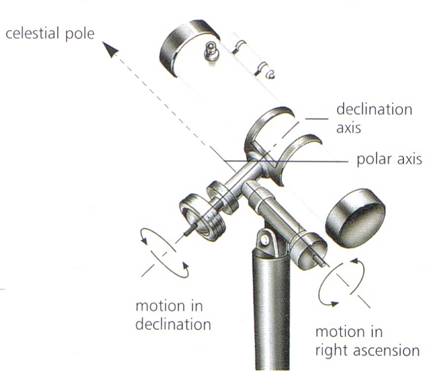
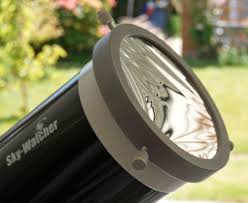
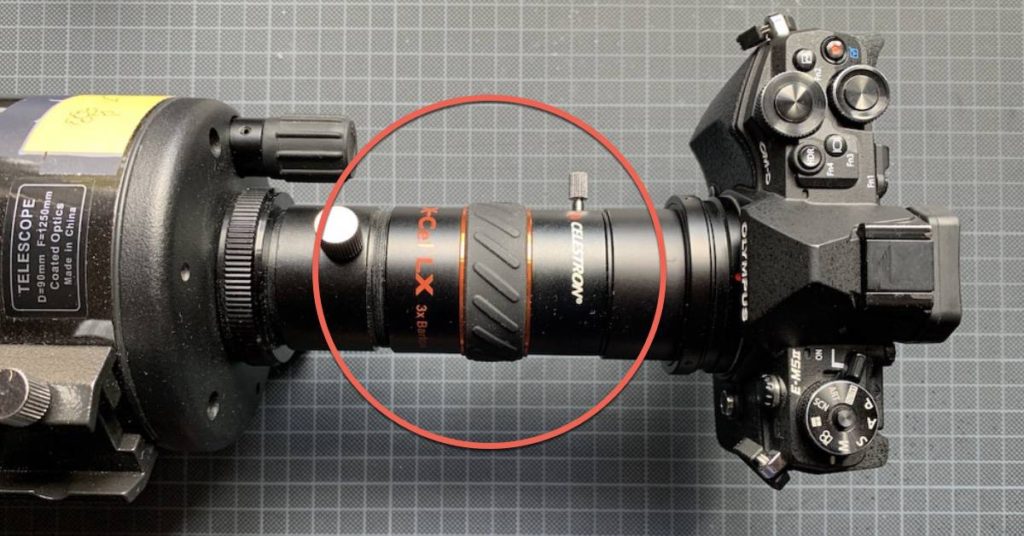
In 2010 I had decided to semi retire but wanted to find an unusual summer job. As luck would have it I was hired as a fire lookout observer in Northern Alberta. After spending the summer of 2011 at the fire lookout I realized it was the perfect place to bring my telescope and as a bonus I loved the job too. The skies are so dark there that you can see the milky way stretching from horizon to horizon. I had recently purchased a cheap Olympus micro 4/3 digital mirrorless camera and decided to see what I could do with it on my by now “old” telescope so in 2012 I took my first photo of Messier 13 (globular star cluster). Messier 13 is a very bright object and did not require a very long exposure time, maybe 2 or 3 minutes with this camera. I was instantly hooked and realized that this telescope-camera combination was capable of seeing so much more than could be seen with the eye looking through the telescope. This immediately opened up many possibilities that I had not even dreamed were possible. I quickly discovered that my biggest challenge was going to be in getting the mount to track well enough to end up with round stars in a long exposure. All computerized mounts are plagued with a certain amount of tracking error and need to have small corrections made during a long exposure in order to end up with perfectly round stars in a photograph. This can be accomplished in two ways. Most astronomers today use an autoguiding system which is a small electronic guidance system that mounts onto the telescope and plugs into the computerized mount. This guidance system sends corrections to the mount keeping the stars perfectly aligned. You can literally walk away during an exposure and let the autoguider do its thing. The other method is to manually guide the mount using a hand controller to make corrections. Most astronomers who manually guide mount a second small telescope on top of the main telescope. You need an eyepiece with an illuminated crosshair which you centre on a star and make the necessary corrections as needed with the hand controller. This is a very labor intensive method of guiding since you cannot take your eye away from the guiding eyepiece during the entire exposure. One of my weaknesses is that I am admittedly a minimalist so I have opted for the manual guiding system. I already had a 90mm Maksutov-Cassegrain scope that I was using to spot smoke at the fire lookout so I mounted it onto my 8 inch Schmidt Cassegrain and found that it worked perfectly as a guiding scope. I was now ready to try some really long exposures. I soon found out that my cheap little Olympus camera had a maximum exposure time of eight minutes but this was long enough for many objects so I honed my skills on the manual guiding taking many shots of each object and throwing away the ones where the guiding was not good enough. The longer the exposure, the greater the chances of tracking errors so most of my early photos were discarded which was very frustrating but it made me more determined to learn how to guide properly. Eventually my skills improved and a few of my pictures were starting to look promising.

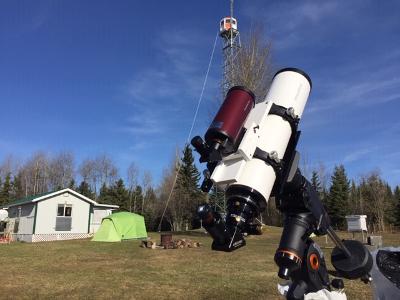
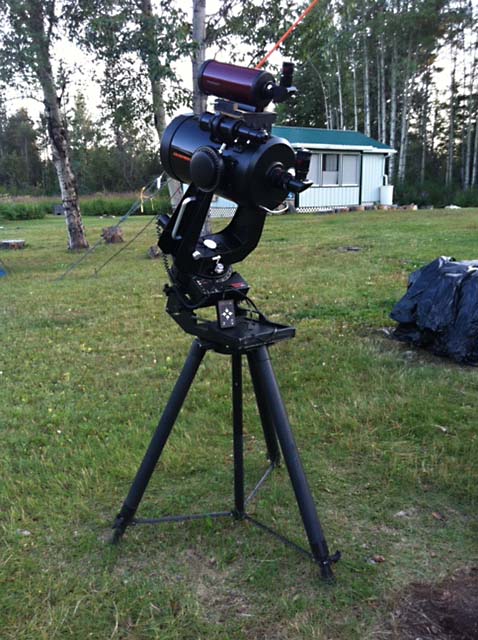
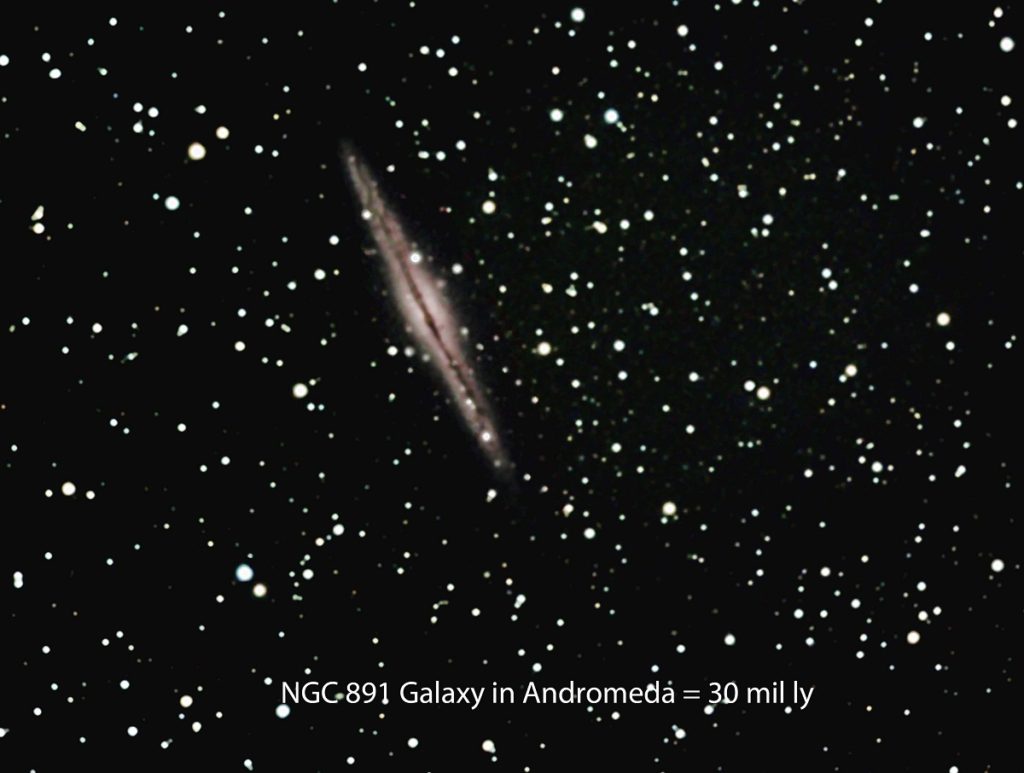
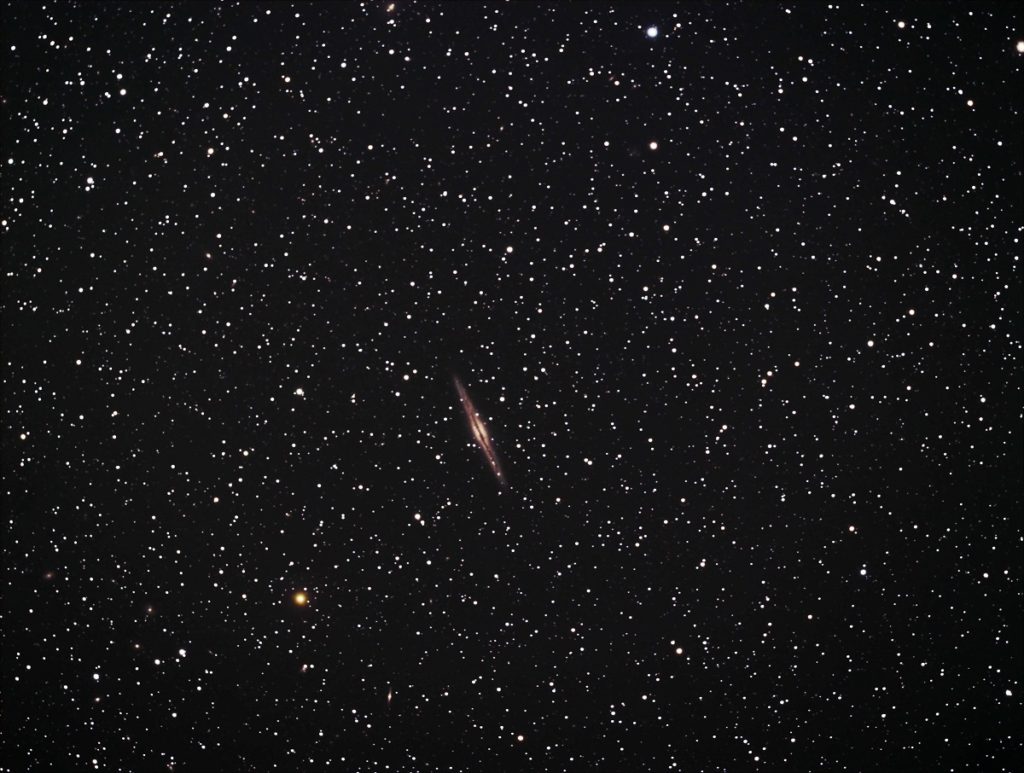
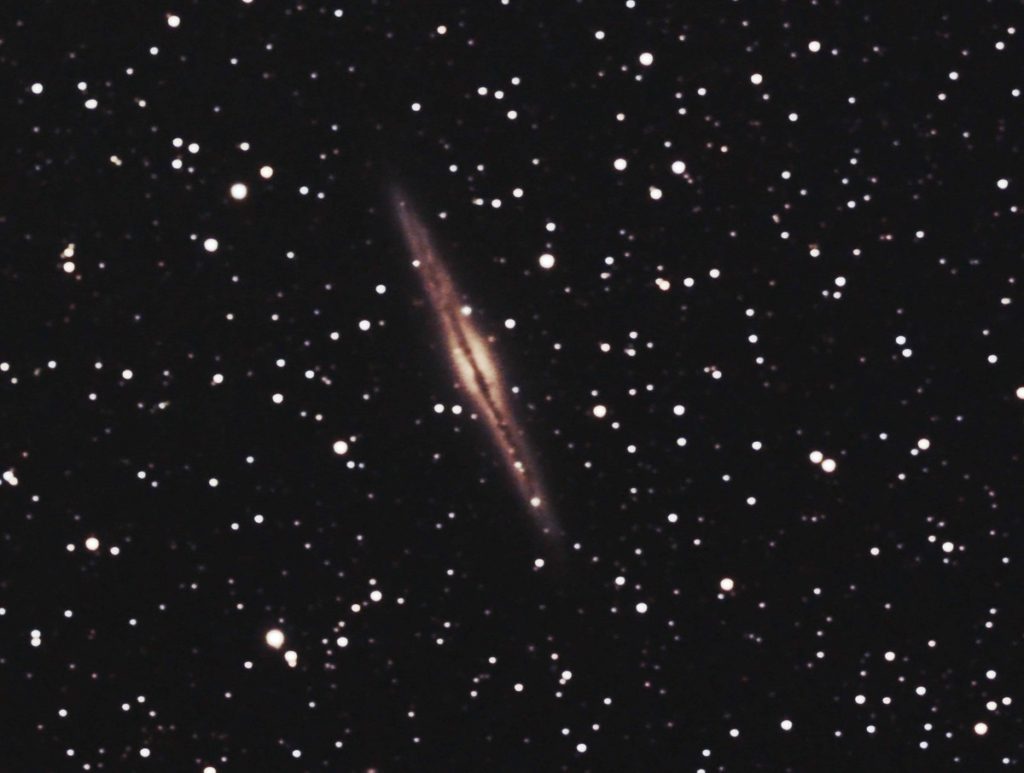
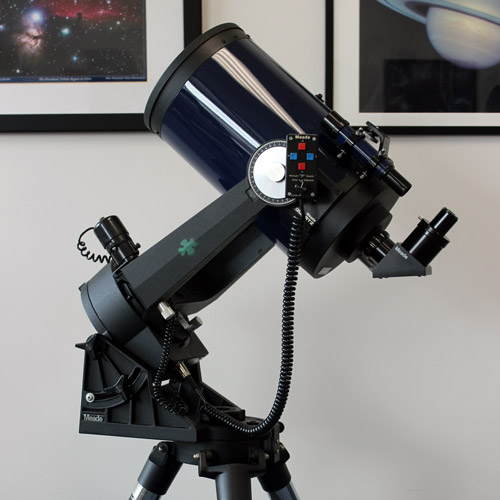
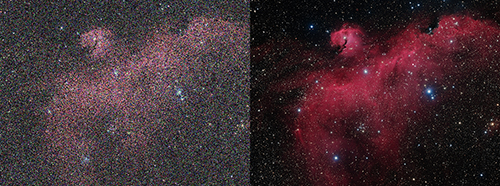
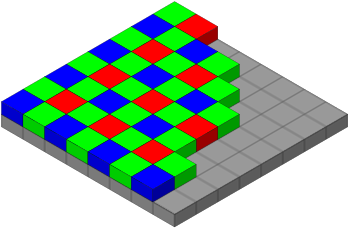
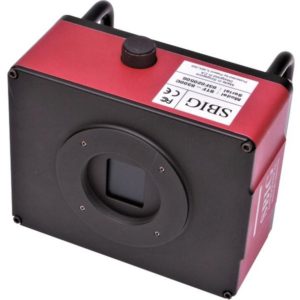
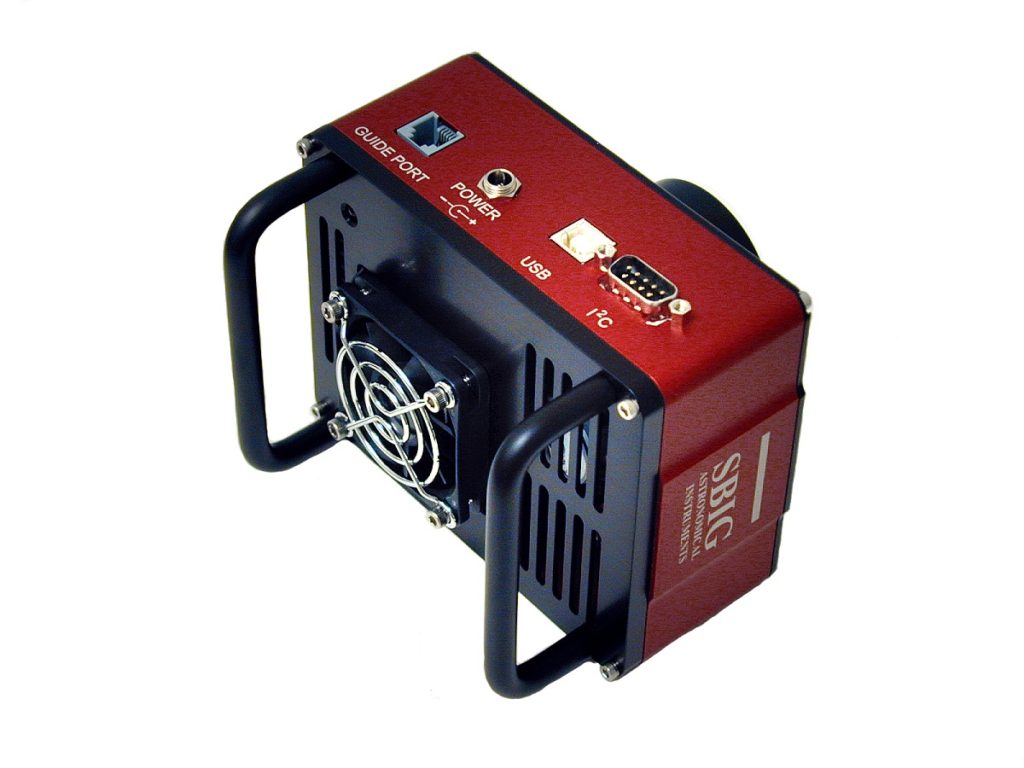
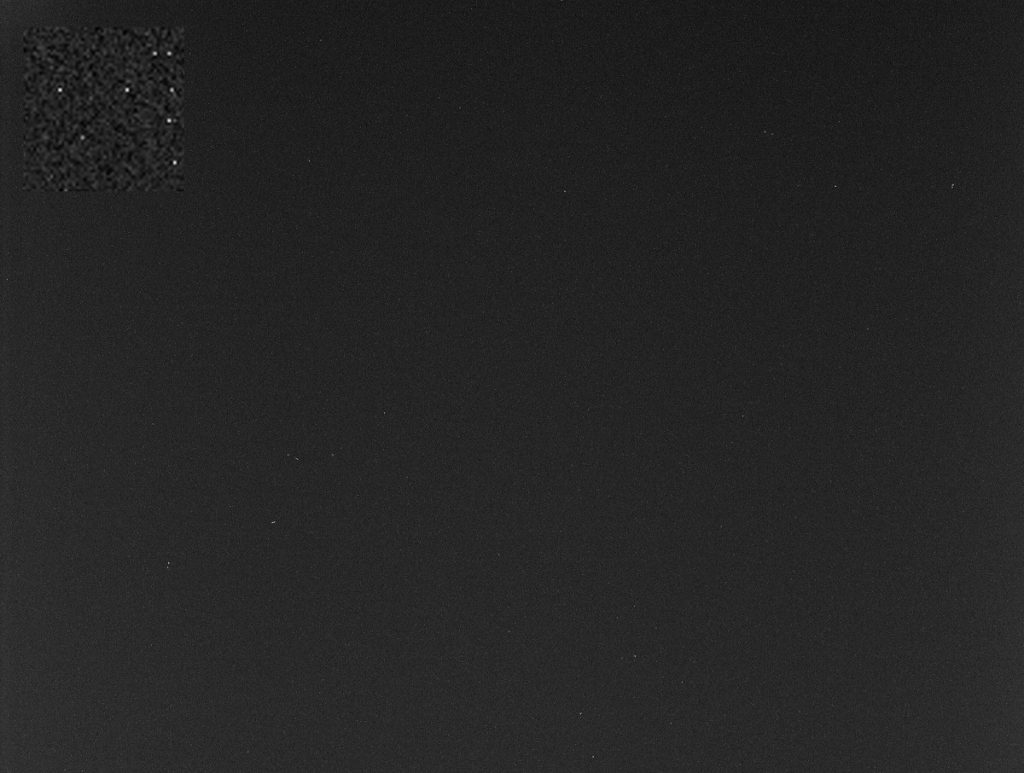
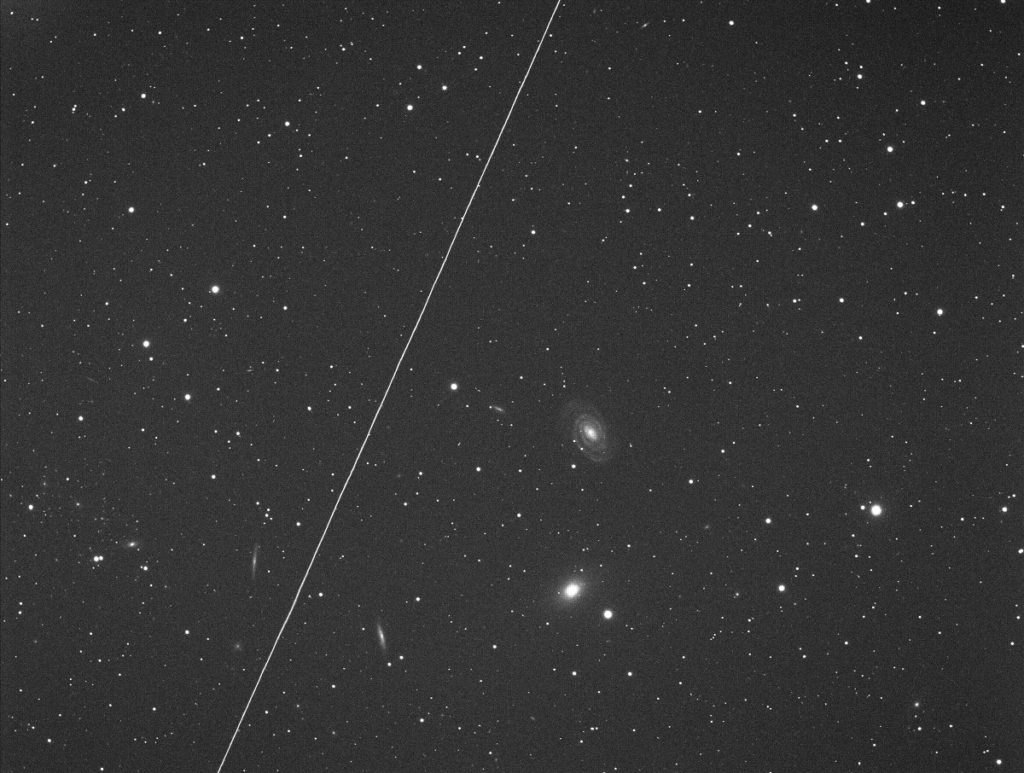
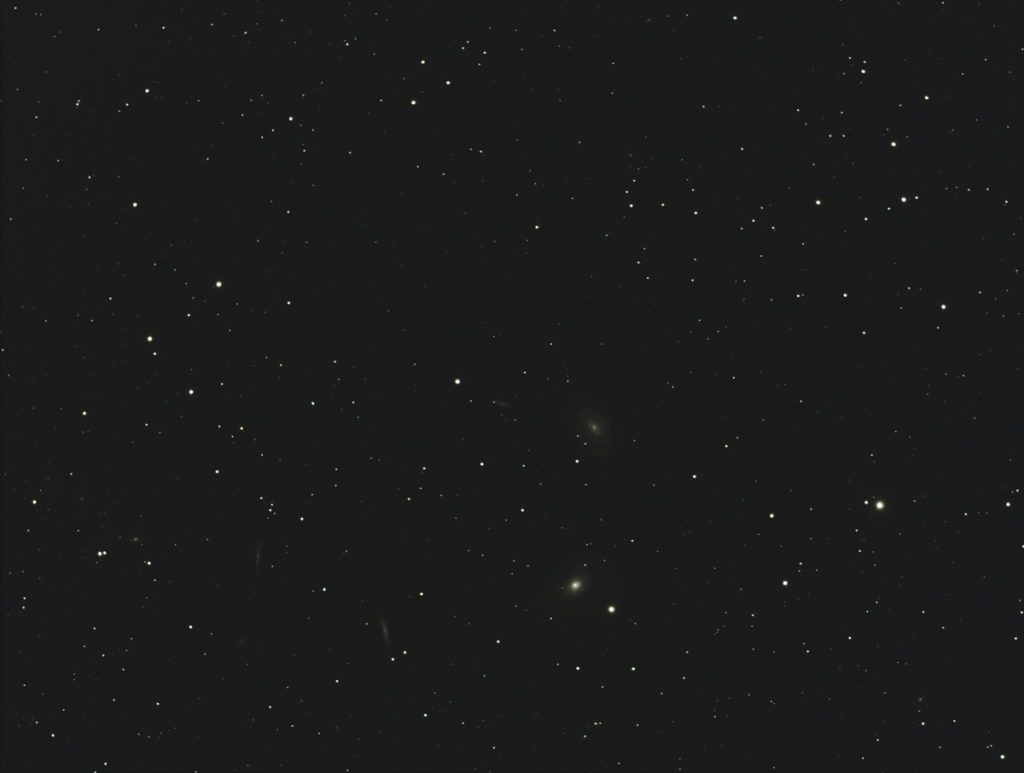
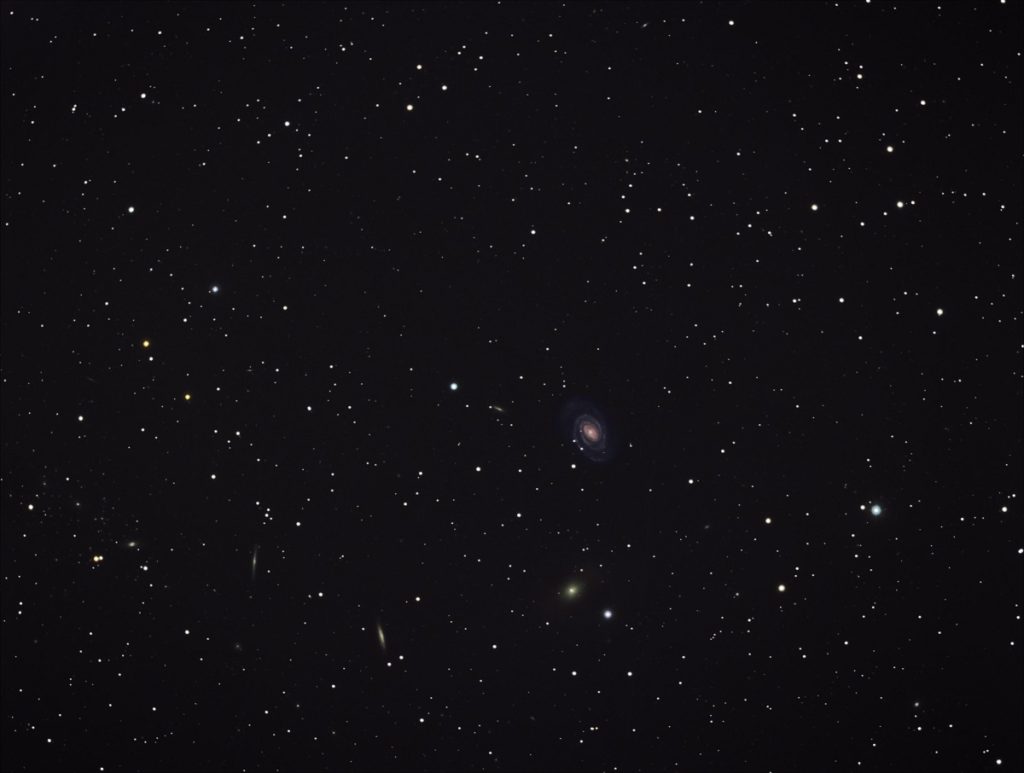
After the 2013 fire season was over I was really getting excited about astrophotography but I realized the limitations of my equipment. My problem was twofold. The camera was not designed for this type of use. Leaving the shutter open for up to 8 minutes caused a large amount of noise (graininess) in the photos which was extremely difficult to get rid of. (I will talk more about the causes of noise and processing photos in another article). The 2nd problem was with my old computerized mount. There have been many improvements in mounts since 1985.The new mounts will automatically slew to any object you want to look at so this is a great time saver and they track much more accurately, needing fewer corrections. I decided to purchase a new computerized German equatorial mount and a dedicated CCD (charge coupled device) astronomy camera. The German equatorial mount is a much heavier and sturdier mount than the fork mount and is the mount of choice for astrophotographers. The CCD camera can only be used for astrophotography and is much more sensitive than a DSLR thus allowing for much shorter exposures. These cameras also have a cooling system that allows them to operate at 40 or more degrees celsius below ambient temperature. This greatly reduces electronic noise in the photos that is caused by heat buildup in the camera. The Hubble telescope as well as all the other major observatories all use CCD cameras. Now the only thing left was to remove the old telescope optical tube from the old fork mount and to mount it onto the new German equatorial mount. Luckily this was relatively easy. There was a steep learning curve in figuring out how to use all this new equipment but soon I was getting photos that far exceeded anything I had done before. This was a serious astrophotography system. I soon discovered that my favorite objects were galaxies and there are lots of them within reach of this system. Fortunately my old optical tube from 1985 was extremely well made and is perfectly suited to hunt down galaxies. I have photographed most of the brighter objects in the northern hemisphere but there are years worth of very faint galaxies to go after. I just program my mount to go to a new galaxy every night. These galaxies are so dim that when I look in the eyepiece I cannot see anything at all but when I install the camera and take a 5 minute exposure, sure enough there it is. I trust my mount so much now that I just install the camera without even looking into the eyepiece and start taking photos. 

                                         Apochromatic Refractor with Guiding Scope and Smaller Finder Scope on Top, Mounted on German Equatorial Mount

1985 Scmidt Cassegrain on old fork mount. Guiding scope and finder scope mounted on top

My newest purchase in 2017 was a new apochromatic refractor optical tube. My old 8 inch Schmidt Cassegrain was great for galaxies but not so good for other things like nebulas, star clusters and very close galaxies. Believe it or not the old scope actually has too much magnification and therefore too small of a field of view for some of these objects. I could not take a photo of the Pleiades star cluster for example because only 2 or 3 of the Pleiades stars would fit into the photo. Apochromatic refractors are very expensive telescopes but offer incredible wide field views with razor sharp optics. Now I have the option of mounting either optical tube onto the mount depending on what I would like to photograph. You need a very dark sky to go after faint galaxies so on a night when the moon is interfering I usually switch targets and go after some of the brighter star clusters. I am stubbornly still manually guiding all my astrophotos and actually enjoy it as part of the challenge. I have often said that astrophotography is one of the most difficult forms of photography but also one of the most rewarding. 

I have definitely not taken the easiest path to get to this point, in fact most astrophotographers would probably say that I have done it completely backwards. In my next article I would like to discuss a better way to get started into astronomy or astrophotography. 

Clear skies

GETTING STARTED IN ASTRONOMY

Part 1. Observing With Your Eyes and Binoculars

Article and photos by Fred Pugh

In my last article I talked about my journey in astronomy and eventually leading into astrophotography. For anyone who finds that they are interested in the night sky and is wondering how to further pursue their interest, I would like to suggest a better path than the one I took. 

What can you see with your naked eye? This is an excellent place to get your feet wet and it costs nothing. Our own Milky Way Galaxy contains somewhere between 100 billion and 400 billion stars, depending on which paper you read. The real number is probably somewhere between those two large numbers. If you find yourself in a dark sky location and have average eyesight, you will be able to see between 3500 and 4500 stars which seems too low to almost everyone because most people believe they can see many times more. Apparent magnitude is the measure of an objects brightness as seen from earth and is a logarithmic scale where a 5 point change on the scale equals a 100 times difference in brightness. The higher the number on the scale, the dimmer an object is. Saturn’s maximum brightness is 0 on the apparent magnitude scale. Polaris’ (the north star) apparent magnitude is 2 and Neptune is 120 times dimmer at magnitude 8. At the other end of the scale is Jupiter and Mars with maximum apparent magnitudes of -3, Venus at -5, the full moon at -13 and the sun at -27. The limit of of our vision is approximately magnitude 6 and this is how we know that we can only see between 3500 and 4500 stars under a dark sky. 

This does not mean that we cannot see much with our naked eyes. The constellations are the best place to start and are helpful when trying to locate objects. It is not necessary to learn all the constellations and to be honest some are almost impossible to see. (Bob Saunders wrote an excellent article describing constellations and pointer stars in the summer sky.  The Milky Way with its various features is a wonderful sight on a dark night. The planets Mercury, Venus, Mars, Jupiter, Saturn and Uranus are all within the reach of our eyesight. Several of the Messier catalogue objects can be seen with the naked eye including star clusters like the Pleiades (M45) and nebula like the Orion Nebula (M42) and also one object that lies totally outside our own Milky Way galaxy. The Andromeda galaxy, 2.2 million light years away, is easily visible from a dark sky site and when you realize it’s light has been travelling through space for 2.2 million years to finally reach your eyes, it can make you feel very small. Other things that are of interest to naked eye observers are solar eclipses, lunar eclipses, moon phases, meteor showers, planet movements  and groupings, double stars, comets, and northern lights.

 On a September night in 2015, I was trying to photograph galaxies, using my old 8 inch Schmidt Cassegrain telescope when the Northern Lights (Aurora Borealis) decided to put an end to my galaxy night. Some nights are just better for observing with your eyes only. (figure 1)

Figure 1. 15 second exposure taken with an Olympus EPL1 mirrorless camera on tripod at ISO 400.

After learning some of these basics,  the next obvious step is to pick up a pair of binoculars and point them skyward. A 7×50 binocular in a dark sky site can increase your visibility down to approximately magnitude 10. This greatly increases the number of objects you will be able to see as well as the details visible. Remember the first number is the magnification and the second number is the size of the aperture in millimetres so a 7×50 binocular magnifies 7 times and has 50 millimetre objective lenses. A binocular with objective lenses larger than 50 millimetres will let in more light and will be heavier but will tire your arms sooner and will be much harder to hold steady. A tripod will be necessary for any of the larger binoculars but the views can be stunning. Many prefer binoculars to any other optical instrument because of their very wide field of view and portability, even with a tripod.

On July 26, 2020 I took this photo of Comet Neowise (figure 2) using a CCD camera mounted on a 5.1 inch apochromatic refractor. The field of view in this telescope was too small to capture the entire comet and tail. This is an example where a smaller telescope or binoculars would have been more appropriate. 

Figure 2. 19-30 second photos taken with CCD camera mounted on 5.1 inch apochromatic refractor. The photos were stacked in Deep Sky Stacker and finished in Photoshop.

Now that you have binoculars and a general knowledge of the constellations you will need some sky charts to show you what objects are visible and where to find them. There are many sites available on the internet that allow you to print sky charts (here for example).   Once you have some sky charts you will notice that east and west are on the opposite sides of the map as compared to a normal road map. (figure 3) This is because when you hold the map over your head, east and west are reversed. One popular method of finding objects from a map is to star hop from one bright star to the next until you reach your target. With a bit of practice you can become quite efficient at finding your targets. It is also very helpful to know a little about the object ahead of time and what you can expect to see in comparable binoculars. Some objects will look like a star that is just slightly out of focus and it will take practise to recognize them.

I will continue in my next article on getting started in astronomy with telescopes. 

Clear skies

Figure 3 A monthly star chart. Note east and west are reversed

GETTING STARTED IN ASTRONOMY

Part 2. Telescope (Optical Tubes)

Article by Fred Pugh

So far we have discussed learning a few of the major constellations and some of the objects down to approximately magnitude 6 that can be observed with the naked eye. Then we expanded our horizon by picking up a pair of binoculars and pointing them skyward, greatly increasing our vision to approximately magnitude 10. If you want to observe objects dimmer than magnitude 10 you will need a telescope. Until now stargazing has cost nothing, assuming that most people already have a pair of binoculars but this is where it starts to get complicated and expensive. A good back yard telescope can achieve a magnitude of approximately 15, depending on the size of the optics and the quality of the sky, and will bring many thousands of deep sky objects within reach. For our purposes, a backyard telescope has optics up to 10 inches. Any telescope larger than 10 inches will be large, heavy, not easily trans[ported, and very difficult for one person to set up not to mention prohibitively expensive. Now is the time to think about where your interests in astronomy lie. Are you most interested in planets, moons, comets and asteroids or are you more interested in star clusters and nebula, or possibly your interests are farther away in galaxies, quasars, etc? Are you  interested in astrophotography? All these things are important in choosing the right telescope and computerized mount for your needs. Maybe you are not sure where your interests lie but would like to find out. One of the most valuable pieces of advice I can give is to try to find the nearest astronomy club and find out when and where they are meeting in the field. Any astronomy club loves to have anyone who is interested to come out and look in their telescopes. This way you can talk to many different people about their interests and look into many different telescopes. This may help you decide what interests you the most without having to purchase any equipment.

There are two basic types of telescopes, reflectors which use mirrors and refractors which use lenses. Remember this very important tip when researching telescopes. Magnification is not a useful specification to look at when comparing telescopes. Light gathering power or aperture and the quality of the optics are much more important. This is what allows us to see a magnitude 15 object. Most reputable telescope manufacturers will not even mention the magnification power of their telescopes. I will try to give a brief description of each along with advantages and disadvantages. Much more information can be found on the internet. Reflectors are the most common telescopes used by amateurs today and the two most common reflectors are the Newtonians and the Schmidt Cassegrains.

NEWTONIAN REFLECTOR
Newtonian reflectors have a curved mirror at the back of the tube. This mirror reflects the light back up the tube to a small diagonal mirror that reflects the image out the side of the tube to the eyepiece. (figure 1)

Figure 1. The optical path of a Newtonian Telescope
Figure 2. A popular Newtonian Telescope optical tube with eyepiece and finder scope

ADVANTAGES OF NEWTONIAN TELESCOPES
They have a very simple design that gives you the most aperture per dollar.
Short focal lengths and wide fields of view make them good for star clusters, nebula and galaxies.
A typical 10 inch tube is approx. 39 inches long and weighs approx. 26 lbs., so still quite portable.

DISADVANTAGES OF NEWTONIAN TELESCOPES
Because of short focal length, high quality eyepieces are required for sharp views.
The mirrors become misaligned very easily and will require frequent collimation. With practice this can be done in a few minutes.
Newtonian telescopes suffer from coma, an optical aberration where the stars near the edge of the field appear wedge shaped (figure 3).
Can be used for astrophotography but not as easily as other telescopes.
The image is upside down therefore this design is not suitable for terrestrial viewing.

Figure 3. An example of Coma that affects all Newtonians showing a star at the edge of the field. Correctors are available to eliminate this problem for photographic use.

SCHMIDT CASSEGRAIN
Schmidt Cassegrain telescopes combine a curved mirror at the back along with a lense and a small mirror at the front to fold the light path. This allows the tube to be much shorter and also corrects the coma problem that the Newtonians suffer from. (figure 4)

Figure 4. The optical path of a Schmidt Cassegrain Telescope
Figure 5. A popular Schmidt Cassegrain Telescope optical tube with eyepiece and finder scope.

ADVANTAGES OF SCHMIDT CASSEGRAIN TELESCOPES
Excellent all purpose telescopes for deep sky viewing and astrophotography.
Excellent for the moon and planets.
Compact design and very portable. A10 inch tube is approx. 24 inches and weighs approx. 22 lbs.
Excellent optical quality with sharp images to the edge of the field.
Nearly maintainance free. They may need collimating from time to time but tend to hold their collimation for much longer that the Newtonians.
Longer focal lengths so collimation errors are less important.
Excellent for astrophotography either with a DSLR or a dedicated CCD astrophotography camera.
Can be used for terrestrial viewing but image is reversed from left to right.

DISADVANTAGES OF SCHMIDT CASSEGRAIN TELESCOPES

Considerably more expensive than Newtonians for the same aperture.
Longer focal length means narrower field of view. Larger nebulas, star clusters and even some largegalaxies will not fit into  the field of view.
While the tubes are compact, the mounts tend to be quite heavy.
They take longer to cool down to ambient than Newtonians because the tubes are sealed. This affects image quality until ambient is achieved.

REFRACTORS
Refractors use lenses instead of mirrors and have the classic long tubes that everyone instantly thinks a telescope should look like. All refractors suffer from an effect called chromatic aberration (color distortion) that produces a rainbow of colors around a bright object (figure 8). This is because it is difficult to make all the colors come to focus at the same point as the light passes through a lens.  High quality refractors use multiple lenses containing rare earth elements to correct this problem but the glass is very expensive to manufacture and apertures over 4 inches can be extremely expensive (figure 6). The cheap department store refractors that come on a wobbly mount with poor optics are no good for astronomy and should be avoided.

Figure 6. The optical path of a Refractor Telescope
Figure 7. A popular Refractor Telescope optical tube.
Figure 8. An example of chromatic aberration showing false color fringing. A well made refractor is corrected for this.

ADVANTAGES OF REFRACTING TELESCOPES
Very portable extremely well made telescopes.
Maintenance free, never need collimating.
Extremely high quality, high contrast images sharp to the edge of the field.
Generally shorter focal lengths and wide fields of view.
Best for star cluster, nebulas, moon and larger galaxies.
Excellent for astrophotography with DSLR or dedicated CCD camera.
Good for terrestrial viewing.

DISADVANTAGES OF REFRACTING TELESCOPES
Larger than 4 inch aperture can be extremely expensive.
Smaller aperture and shorter focal length does not have as much light gathering power as the big reflectors.

Below in figures 9,10 and 11, I have attempted a comparison between my 8 inch Schmidt Cassegrain telescope and my 5.1 inch refractor to show the different fields of view as well as a comparison of the quality of the optics. It should be noted that the refractor costs more than double the cost of the Schmidt Cassegrain. Also note that most Newtonian telescopes will have a wide field of view similar to the refractor in figure 10.

Figure 9. An uncropped photo of galaxy NGC 891 in the constellation Andromeda taken Aug. 11, 2015 using my 8 inch Schmidt Cassegrain and CCD camera showing the narrow field of view of the Schmidt Cassegrain. This was the result of 16-5 minute sub frames stacked in Deep Sky Stacker for a total exposure of 80 minutes, and finished in Photoshop
Figure 10. This is an uncropped photo of galaxy NGC 891 taken Aug 20, 2018 with my 5.1 inch refractor and same CCD camera showing the much wider field of view as compared to the Schmidt Cassegrain in figure 9. This photo is the result of stacking 14-5 minute sub frames in Deep Sky Stacker for a total exposure of 70 minutes, and finished in Photoshop.
Figure 11. This is a cropped version of the above photo taken with the refractor showing approximately the same view as the Schmidt Cassegrain in figure 9. A comparison of the two photos reveals that the 2 telescopes performed similarily with the refractor being slightly sharper.

This has been a very brief overview of telescopes and again, much more detailed information is available on the internet, especially from manufacturers.
In my next installment I will discuss computerized mounts to guide your expensive optics.

Clear skies

GETTING STARTED IN ASTRONOMY

Part 3. Telescope Mounts

Article by Fred Pugh

Some beginner telescopes and even a few more advanced telescopes come bundled as a complete package containing the optical tube and the mount but many are sold separately. For this reason I have chosen to discuss each separately. There are usually more options to tailor your system to your specific interests or to allow for future expansion if you buy separate components. There are only two types of mounts available and although they can look very different, all mounts fall within the two categories, altitude–azimuth (alt-az) and equatorial. Both alt-az and equatorial mounts are available in computerized “go to” and non computerized models. Most computerized go to mounts are powered via a 12 volt battery but a few use disposable batteries. They can also be adapted to run on AC power with the right DC adapter. The non computerized mounts are mostly cheap and wobbly so I will concentrate on the “go to” mounts.  Alt-az mounts are the older and more familiar type that we use for cameras and video. They are cheaper to make and are the simplest and the easiest to use. They move a telescope in only two directions with respect to the horizon, up-down or altitude, and side to side or azimuth. This type of mount is most often seen on less expensive telescopes and comes in several kinds such as simple alt-az, single arm fork mount, dual arm fork mount and Dobsonian mount.

Figure 1. A simple alt-az mount
Figure 2. A single fork alt-az mount
Figure 3. A dual fork alt-az mount
Figure 4. A Dobsonian alt-az mount

With the invention of computerized and motorized go to systems these mounts have become much more sophisticated and usually have a database containing many thousands of deep sky objects. After completing an alignment procedure using a simple remote control like hand controller, the mount will go to any object and track it as it moves across the sky. The hand controller will display the instructions on how to perform the alignment. The advantages of the alt-az mount are mainly simplicity and ease of use. They are lighter, easier to set up and cheaper to buy. If your interest is in visual observing only then this may be the best mount for you.  The disadvantages of alt-az mounts are because they are lighter, they are therefore not as stable. They will be more affected by wind and will take longer to settle down after touching the controls such as the focus knob. The main disadvantage however is that they are not suitable for most types of astrophotography. If you are interested in deep sky astrophotography this is not the mount for you.  Why is an alt-aZ mount not suitable for astrophotography? Since these mounts are aligned with the horizon and only move up and down and side to side, they do not follow the motion of the stars which rotate around an imaginary point in the sky called the North Celestial Pole for the northern hemisphere or the South Celestial Pole if you are in the southern hemisphere. This type of mount is not comfortable with this motion (figure 5).

Another problem for this mount is field rotation which is not the same as circular star trails. Field rotation is an undesirable effect on long exposure photographs using alt-az mounts where the centre of the photograph is sharp but the outside has rotated. This will occur no matter where you point your camera in the sky with this type of mount (figure 6).

Figure 5. Star trails showing the circular motion of the stars around the North Celestial Pole. Note: Polaris is the bright arc at the 2:00 position less than 1 degree from the pole.
Figure 6. A single 4 minute exposure of Pleiades taken with a DSLR on Alt-Az mount. Notice how the entire frame rotates around the centre.

Figures 7, 8 and 9 illustrate field rotation. This is how the constellation Cassiopeia would appear over a 6 hour period in a single night using an Alt-Az mount. In all three illustrations the middle star has not moved but all other stars have rotated around it.

Figure 7. Cassiopeia at 9:00 pm
Figure 8. Cassiopeia at midnight
Figure 9. Cassiopeia at 3:00 am

How can we solve the problem of field rotation and track the motion of the stars perfectly for long exposure photography? Fortunately equatorial mounts are designed to completely cancel out the rotation of the Earth. An equatorial mount has one axis that is parallel to the axis of the Earth’s rotation. This means the axis is pointing exactly at the North Celestial Pole (NCP) and is said to be polar aligned  (figures 10 and 11). This is a procedure that must be performed accurately before taking long exposure photographs. The computerized mounts have made polar alignment relatively simple and will guide you through this procedure. When properly polar aligned only one axis is needed to track the stars. This axis is called the right ascension axis and a motor rotates this axis once in just under 24 hours. The other perpendicular axis is called declination.

Figure 10. A celestial sphere
Figure 11. Diagram of a polar aligned equatorial mount

The dual fork equatorial mount uses an equatorial wedge to tilt the mount to allow for perfect polar alignment. This setup is extremely popular for imaging the planets and is also good for deep sky photography (figure 13).

Figure 13. A dual fork equatorial wedge mount.

Advantages of equatorial mounts are that when accurately polar aligned they will track the motion of the stars perfectly allowing for long exposure deep sky photography. They are extremely robust and stable mounts and are not as easily affected by wind or accidental bumps. They are more able to handle heavy equipment and still perform accurately. Several power ports are usually included for add on accessories and to better manage wires. Disadvantages are that a good mount for astrophotography is often more expensive than the optical tube. These mounts also can be very heavy and harder to set up, but break down into manageable parts. They are more complicated and in order to perform properly they have to be accurately polar aligned.  With a bit of practice this should not take longer than 1/2 hour. Note: Alt-az mounts always come with the tripod included except in the case of the Dobsonian where no tripod is needed. Many equatorial mounts also include a tripod but some are available without a tripod. These are usually mounted on a pier inside a permanent observatory.

Next time I will talk about cameras for astrophotography.
Clear skies

GETTING STARTED IN ASTRONOMY

Part 4. Cameras for Astrophotography

Article by Fred Pugh

Almost any modern digital camera can be used for astronomy as long as it can be mounted on a tripod and has the ability to leave the shutter open for a few seconds. The Milky Way, constellations, meteor showers, comets, star trails etc., do not require sophisticated cameras. In order take photos through a telescope however, you need to have a camera with a removable lens or a dedicated astronomy camera. Any DSLR or mirrorless camera can be adapted to a telescope which essentially turns the telescope into a giant camera lens. If you want to take long exposure photographs of deep sky objects, the telescope and camera needs to be mounted on an equatorial mount that will track the motion of the stars perfectly. I discussed equatorial mounts in the previous article on mounts. All digital cameras suffer from a common problem. The longer you leave the lens open, the hotter the sensor becomes which causes noisy data. This noise looks similar to the snow that we used to see on our old television screens and sometimes overwhelms the object we are trying to photograph (figure 1). There are also other types of noise that creep into the sensor adding to our problems. Fortunately there are ways of cleaning up most of this unwanted noise which hopefully leaves us with a good signal to noise ratio in the end and a good photograph. I will talk about how to clean up noise and processing in my next letter but for now the point is the less noise in the data in the first place, the better. This will make the processing much easier and will result in a much better final product. There are 3 types of digital cameras that are commonly used for astronomy, DSLR including mirrorless, CCD and CMOS. The latter 2 types are dedicated astronomy cameras and cannot be used for conventional photos. DSLR’s and mirrorless cameras with removable lenses are common and if you have one already, most beginners start here. These cameras actually have CMOS based sensors but I will treat them as a separate group because these cameras can be used for regular photography as opposed to the dedicated astronomy CMOS cameras. Generally a DSLR or mirrorless camera will be less expensive than a dedicated astrocamera with the same size sensor. The larger the sensor, the larger the field of view will be in the photograph. A 4/3 sensor will have a smaller field of view than a full size 35mm sensor. The DSLR-mirrorless cameras are less sensitive than the dedicated astronomy cameras so will require a longer exposure time. The sensors in these cameras were not designed for long exposures so they will get quite hot thus causing more noise in the data. These cameras also have an infrared-cut filter installed to make daytime photos look more natural. This is unfortunate for astronomy because the filter will remove some of the red color in some nebulas (figure 2). It is possible to partially compensate for this in post processing with a program like Adobe Photoshop or other similar programs. This filter can be removed by a professional or Canon and Nikon have available an astronomy version with the infrared-cut filter already removed. Many deep sky objects have little or no red in them and will not affected by the filter. I have seen many amazing astrophotos taken with these cameras despite their challenges. One nice advantage of a DSLR is that the pictures are stored on the camera so no laptop is needed for storage. Focusing is also done using the camera display instead of a laptop although this can be difficult on the small camera display. Also because DSLR’s are color cameras, you
will get a color picture all in one step.

Figure 1. Heat noise caused by a hot sensor can overwhelm the data. Much of this noise can be cleaned up in post processing but less is better.

Figure 2. The Orion Nebula complex. Both these photos were taken with a Canon DSLR. The photo on the left has the infrared-cut filter in place. The photo on the right has been modified by removing theinfrared-cut filter.

CCD (charge-coupled device) cameras were first produced in 1972 but were prohibitively expensive and were only used for scientific purposes. By the 1990’s their price had come down enough that they virtually replaced film for astrophotography. When compared to the modern DSLR , the CCD is much more sensitive and has a greater dynamic range for faint details. Because they are more sensitive, a shorter exposure is required which is a great advantage. CCD’s also have fewer pixil defects and less noise allowing for a higher signal to noise ratio. Another huge advantage is that most of these cameras have a cooling system to keep the sensor from overheating. Many CCD’s are cooled to -40 or -50 degrees Celcius below the ambient air temperature. This greatly reduces heat noise and vastly improves the signal to noise ratio (figure 3, 4). They come in black and white, and color versions. The color versions use a bayer filter pattern similar to DSLR’s to create a color picture in one step (figure 5). With the black and white version it is necessary to take separate pictures with red, green, blue and luminance filters. Later these separate pictures are combined to create a color picture. This is how the bayer filter in a DSLR creates a color photo but it does it all in one step. You may be wondering why anyone would want to use a black and white CCD as opposed to a color version. The bayer filter needed to produce a color picture in one step is less efficient than using individual red, green, blue and luminance filters so a small amount of signal is lost. For this reason the best photos are taken with black and white cameras and are therefore used by most professionals. This is how the Hubble pictures are created. The main disadvantage for the CCD is that it is still the most expensive option and the black and white CCD’s are much more work intensive than a color CCD or DSLR. Another disadvantage is that a laptop is required to store the photos on and also for focusing the camera although focusing is much easier on a laptop. This also means that a cable has to run from the camera to the laptop which is another thing to trip on in the dark.

Figure 3. I took this photo of Messier 27, also known as the Dumbell Nebula in July 2013 with an Olympus 4/3 mirrorless camera. I took 20-3minute frames and stacked them in Deep Sky Stacker to minimize noise, then enhanced and sharpened in Photoshop Elements. Even though much of the noise was eliminated, this photo is still quite grainy. The colors, especially the reds are washed out due to the infrared-cut filter in this camera. This photo is uncropped.
Figure 4. I took this photo in July 2020 with a full sized sensor CCD camera. I took 25-1 minute exposures and stacked them in Deep Sky Stacker to minimize noise, then enhanced and sharpened in Photoshop Elements. There is less graininess in this photo than the above photo, the colors are more vibrant and more detail is visible even though the exposure was much shorter. The field of view was much larger because of the full sized sensor in this camera so this photo was cropped to approximate the field of view above.

Figure 5. The Bayer arrangement of color filters on the pixil array of an image sensor. Color DSLR’s,
color CCD’s and color CMOS cameras all use a similar arrangement to create a color picture.

The dedicated CMOS astronomy camera started out as a high speed video stream camera and is the best way to capture planetary images. A high speed video strip is taken capturing thousands of frames. Only a small percentage of the best quality frames are used to create the final image, which can be spectacular (figure 6). These cameras have small sensors and are extremely cheap. There has been a recent revolution in CMOS cameras with full size sensors that take a single frame picture instead of a video stream and they have been threatening to catch up to the CCD’s (figure 7). The CMOS cameras are much cheaper to produce and are very sensitive but they still produce more noise. It is believed that they will eventually overtake and replace the CCD’s except in the most sensitive scientific applications. The CMOS cameras also come in black and white or color and many are now cooled just like the CCD’s. Because the signal to noise ratio is still not a good as in the CCD cameras, more post processing is required.  A laptop is also required for photo storage and for focusing.

Figure 6. A stunning example of Saturn taken with a very inexpensive CMOS film strip camera. Usually a film strip consisting of several thousand frames is captured and stacked.
Figure 7. IC 1805 Nebula taken with a full size sensor CMOS color camera. More post processing is required to minimize noise but some beautiful results are possible.

Next time I will talk about taking the photos, exposure times, how many frames to take and processing tips.
Until then
Clear skies

GETTING STARTED IN ASTRONOMY

Part 5. Acquiring Deep Sky Photos and Processing Them

Article by Fred Pugh

The main objective for an astrophotographer is achieve the highest signal to noise ratio possible which will ultimately result in the best photograph. We know that all digital cameras regardless of price or manufacture are plagued with various types of noise that hide much of the faint signal we are trying to record. Fortunately, various methods have been developed to deal with most of this noise allowing us to bring out finer details than ever before. The problem however is that astrophotography can become very work intensive and professionals and even some very dedicated amateurs can spend days, weeks, months or even longer to get one perfect photo. These photos are often used for scientific research so no amount of time is too much. It is common for an average amateur astrophotographer to spend a few days to acquire a single photograph. For myself, astrophotography is a hobby and my photos are for personal interest only but of course I also love to show them to anyone who is interested. As I have said before I am somewhat of a minimalist and also a little lazy so I try to spend only a single night on each
object I am photographing and then typically no more than a few hours to process each picture which I work on at a later date. I have on very rare occasions used 2 nights to gather a few more photos to work with, especially if I was not happy with the results of the first night. The CCD camera that I use for my deep sky photos is the SBIG STF-8300C (figure 1). This is a full frame color camera, again demonstrating my laziness because the color version involves much less work than the black and white version but also has a little less resolution. I will use my own photos from now on where possible to demonstrate various points.

Figure 1. SBIG STF 8300C color CCD Camera

What are the types of noise that can ruin our pictures and how do we deal with them? Dark current and light pollution or airglow are the major types of noise that we need to worry about in astrophotography.  Dark Current is the signal or noise that builds up on the sensor over time even when there is no light falling on it and includes hot pixils, cold pixils and amplifier glow. Hot pixils are broken pixils where the dark current is higher than the average so they show up as white specks against the salt and pepper background and dark pixils are broken pixils that show as black specks. Amplifier glow is the slight brightening on the left side of the image and is caused by the very small but ever present glow emanating from the on chip amplifier. This dark current is unwanted noise that is present in every
photo. To demonstrate dark current I have taken a photo with the lense cap on so that no light can reach the sensor. (figure 2 and figure 3)

Figure 2. This is a 5 minute exposure taken on my CCD camera on May 12, 2020 with the lens cap on showing dark current including hot pixils, cold pixils and amplifier glow. The inset in top left corner is a magnified view. The camera was cooled to -30 C which greatly reduces the amount of dark current noise but does not eliminate it. The data in this photo is 100% noise.
Figure 3. I took this single 5 minute exposure of NGC 5364 in the constellation Virgo on May 12, 2020 at the same temperature and ISO setting as above. This photo contains all the dark current noise from above, noise caused by light pollution, a satellite trail which is also considered unwanted noise and vignetting, or darkening near the edges of the field of view.

Since dark current is repeatable from shot to shot, this means if we take a light photo of a deep sky object and then another dark photo using the exact same exposure length, ISO setting and at the same temperature with the lense cap on, it is possible to subtract the dark current or noise from the signal. In order to accomplish this however we must take several light and dark pictures and then stack them on top of each other. I usually try to take 15-20 light frames in a night and approximately 10-12 dark frames if time and conditions permit. I commonly use a 5 minute exposure but can be more or less depending on how bright or dim the object is. Further complicating the process, we must move each light frame very slightly so that the stars and object that we are trying to photograph do not fall onto the same pixils in each picture. This very slight movement of each light frame is called dithering. Because the dark current noise is constant, the same pixils are affected in every frame but the desired signal moves very slightly from one frame to the next. This is how the subtraction can be made. One program that is designed to do this and is available as a free download is http://deepskystacker.free.fr/. There are other similar programs available for this purpose but because deepskystacker is free, it is the most popular and is extremely powerful.

Now that we have removed the dark current we are still left with the other troublesome noise caused by light pollution or sky glow. The good light can be subtracted from the unwanted light relatively easily because the unwanted light is random in each frame but the desired signal is fixed. You can also greatly
reduce the impact of this noise by increasing the amount of signal gathered so the more frames you take, the better the signal to noise ratio will be. Stacking multiple frames and then combining them into a single result reduces the noise by averaging in more signal and averaging down the noise. Even other unwanted types of noise such as satellites, airplanes, meteors, cosmic ray hits, etc will be averaged out at the same time because of their completely random nature. The same deepskystacker program as above does a wonderful job of reducing light pollution and other random noise. Vignetting, uneven field illumination and other problems such as dust spots on the sensor or lens can also be eliminated by deepskystacker but we need to take a different approach. All camera lenses and telescopes display a certain amount of vignetting and uneven field illumination that is caused by the geometrical properties and imperfections of the optical system but fast lenses are most prone. The most common method of dealing with this problem is to cover your telescope with a white cloth after finishing a nights session of taking as many frames as possible of the object you are photographing. This has to be done without moving the orientation of the camera on the telescope and without touching the focus knob. The system has to remain exactly the same as when you took your important frames over the night. The idea is to take a few frames (I usually work with 10 frames) of the early morning sky with the white cloth covering the telescope lens. This is done with the fastest possible shutter speed while pointing at an evenly illuminated part of the dawn sky (figure 4). Next you put the lens cover on the telescope and take 10 more dark frames with the same short exposure time. These 20
frames are called flat frames and dark flat frames and are stacked in deepskystacker all at the same time as the rest of the frames (figure 4 and figure 5). The program examines the flat frames, compares them to the dark flat frames and determines the corrections that need to be made to correct the vignetting and uneven field illumination. At the same time if there are any spots that are caused by dust which can often look like donuts on the picture, the program will repair these too.

Figure 4. I took this flat frame in the early morning on May 12, 2020. A white cloth was draped over the front of the telescope and exposure time was .01 seconds. The vignetting and uneven illumination is easily visible.
Figure 5. This is a dark flat frame taken with the lens cap on. Exposure time was .01 seconds.

When stacking all these frames in deepskystacker, I will usually try the stacking process 5 different times using different settings within the program and choose the best result. I recommend to anyone who is interested in seeing this process to view deepskystacker tutorials on youtube as it is much too involved to talk about here. After finishing the stacking in deepskystacker, the image needs to be saved and is now ready to take into Photoshop or some similar program. The image can look quite disappointing after it is stacked but that is because deepskystacker is not meant to be a finishing program. All the magic is embedded into the picture and is ready to be teased out in another program (figure 6).

Figure 6. This is the result after stacking NGC 5364 in deepskystacker. Note the data looks faint and subdued. Also note the satellite trail is gone, vignetting is much improved and there is much less grainy noise. The picture is still almost black and white at this point but all the data is embedded and ready to be teased out in another program.

Unfortunately Photoshop is much too complicated to discuss here. Again there are many tutorials on youtube on how to process astrophotos using Photoshop or similar programs. I find that processing astrophotos is an ever evolving process. Every year I learn new techniques and in some ways it can be a little frustrating because when I learn something exciting, I feel compelled to go back and reprocess all my photos from years past. The problem is that I am almost always able to improve the photos. For this reason it is very important to safely store all your raw data. Everyone develops their own techniques for processing astrophotos. There is a certain amount of artistic license in Photoshop. You cannot change the data but you can enhance it to the point where it does not look natural. This is especially true for colors and I see many photos on the internet that have been enhanced way beyond the point of looking natural. Everyone has their own preference and
nobody can say that it is right or wrong. For myself I prefer more muted colors than many.

Figure 7. This is my uncropped version of NGC 5364 after stretching the data to bring out the faint details. Note the many very faint galaxies in the background that have appeared. After stretching I enhanced the color a little, smoothed out some of the noise that was still remaining and applied a small amount of sharpening. There is still a bit of vignetting visible. Some of this darkening can be caused by the stacking process and usually gets cropped out.

My work flow for creating this photo is as follows:
Telescope – Stellarvue SVA130T 5.1” Apochromatic Refractor
Camera – SBIG STF 8300C
Mount – Celestron CGEM DX
Light Frames – 17 at 5 minutes each
Dark Frames – 10 at 5 minutes each
Flat Frames – 10 at .01 second each
Dark Frames – 10 at .01 second each
Inspected all light frames for tracking errors, in this case all frames were kept
Converted all frames from RAW to FITS files
Stacked in deepskystacker to reduce noise and enhance signal
Imported into Photoshop to stretch data, smooth remaining noise, enhance color, sharpen and crop

Figure 8. This is the cropped version of the above photo which has taken care of any remaining vignetting and enlarged the galaxy of interest. NGC 5364 is a grand design spiral galaxy in the constellation Virgo. It has a magnitude if 11.2 and lies at a distance of 54.5 million light years. It is believed that there has been an interaction between NGC 5364 and NGC 5363 at the 6:30 position which has stretched out or elongated the form of NGC 5364. There is a supermassive black hole at the centre of this galaxy.

I hope I have not scared anyone off with all this technical information. To tell the truth I am sometimes a little intimidated by it so I have to refresh my memory about how it all works periodically. I try to get into a routine of collecting the best data that I can when out under the stars and that is what I love. I would be quite happy to let someone else process my data, who is better at it than I am, to come up with a final picture but in the meantime I try to muddle my way through it. Since this article is getting a bit too long and I have not yet talked about planetary photography, I will continue next with a hopefully shorter talk about photographing ahd processing planets, including the moon.
Until then,
Clear skies

GETTING STARTED IN ASTRONOMY

Part 6. Acquiring and Processing Planetary Photos 

Article by Fred Pugh

If you are interested in photographing planets, the moon or even the sun, you may be surprised to learn that it is generally much easier than deep sky photography. A note of caution for anyone who is interested in photographing the sun, never look directly at the sun or point any optical instrument toward the sun unless you have a proper solar filter installed securely on the instrument because instant blindness can occur (figure 1). Children should never be left unattended around a telescope that could be accidentally pointed towards the sun.

Figure 1. A mylar solar filter with locking screws installed on a telescope will allow you to safely observe the sun.

The planets and moon are much brighter than deep sky objects like nebula and galaxies. They are so bright in fact that we do not need to be concerned about light pollution. Many of the best amateur photos of planets have been taken from backyards in major cities. We do not need to transport our equipment to a remote dark sky site. Also we do not need the long exposure times that are required for deep sky objects. In most cases an exposure of less than 1 second will suffice for a single frame or as I mentioned in my previous article Cameras for Astronomy, a short video can be taken. Another major factor in the ease of planetary photography is that because the exposure times are so short, the computerized tracking does not have to be nearly as precise. A relatively cheep alt-az mount that just will not work for deep sky photography will suffice for planetary photography. (See my previous article on Telescope Mounts). Noise is not as much of a problem either because of the brightness of the objects and very short exposure times.

Just in case you are thinking this is starting to sound easy, I will try to describe some of the pitfalls in planetary photography. Planets are very small in comparison to deep sky objects so they require very high magnification in order to show any details. This high magnification can be accomplished in a couple of ways. A barlow lens (figure 2) can be inserted into the optical path that will increase the focal length and increase the magnification from two to five times, depending on the barlow. A focal length of f20 is often used for this type of work but if conditions permit it may be possible to boost the focal length up as high as f30. Another way to boost magnification is by the eyepiece projection method where the camera is mounted on top of the eyepiece, which is not normally used for photography. With this method extremely high magnification can be achieved but it is usually not useful because once you reach the theoretical magnification limit of the telescope, the image just becomes bigger and more blurry. Most photographers use the barlow method to increase magnification claiming it gives better results. When you are using this much magnification, the optics in your telescope need to be perfectly collimated or you will end up with a fuzzy planet showing little or no detail. (I talked about collimation in my article about Getting Started in Astronomy Telescopes).

The atmosphere as another annoying problem for this type of photography. Even when the night is perfectly clear, there are very few nights when the atmosphere is stable enough to allow the use of high magnification. Unfortunately most clear nights are not suitable for planetary work and often the only way to know for sure is to set up your telescope and take a look. When the atmosphere is unstable there is nothing you can do except wait for a better night to photograph planets. Luckily many of the nights that are not good enough for planets are good enough for deep sky objects like nebula or galaxies that require much less magnification so if you are willing to be flexible, you can still have a good night. In my earlier article Cameras for Astronomy, I talked about how most planetary photography these days is done with a video camera (figure 3). Even when the atmosphere appears unstable, there can be brief moments of stability when all of a sudden very fine details are visible on a planet. These moments are usually very fleeting and are often too quick for our eyes to even notice. If you take a short video lasting a minute or two and then examine it frame by frame, you will see that there are a small percentage of frames that show a considerable amount of detail on the planet. These frames can be sorted and stacked in a program sometimes producing fantastic results. This type of photography is  referred to as lucky imaging because you are taking advantage of a small percentage of good frames to stack while throwing away the rest.

Figure 2. A barlow lense inserted into the optical path between the camera and telescope can increase the focal length and therefore the magnification from 2-5 times.
Figure 3. The ZWO ASI385MC is an example of a dedicated CMOS astronomy video camera that takes 120 frames per second and is cooled to 40 degrees celcius below ambient temperature to reduce noise.The stunning pictures below (figures 4, 5, 6) were all taken with the ZWO ASI385MC CMOS video camera and a Celestron 11 inch Edge HD backyard telescope. These photos would rival anything produced by the great observatories on Earth only a few years ago.
Figure 4. Top left to right Neptune, Saturn. Bottom left to right Jupiter and Mars.
Figure 5. A close up of the moon
Figure 6. Sunspots.
Figure 7. A Canon EOS Rebel 3Ti. DSLR Cameras like this are capable of taking very good quality video.

Many of our modern DSLR and mirrorless cameras (figure 7) are also capable of taking a video and can produce some very good results even though they are not cooled and also probably take less frames per second than the dedicated astronomy cameras.

The pictures below (figures 8, 9, 10) were all taken with a Canon EOS Rebel 3Ti and an 11 inch Celestron Schmidt Cassegrain backyard telescope.

Figure 8. Sunspots and the International Space Station transiting the Sun.
Figure 9. From top to bottom Neptune, Uranus, Mars, Saturn and Jupiter.
Figure 10. The Moon crater Plato.

The processing of the video frames captured in this type of astrophotography requires a different stacking program than used for deep sky objects. The software that is most often used,  is available here as a free download . This is a fairly easy program to use but there are many tutorials on Youtube that will be very helpful in getting started. I often find a little trial and error in this program produces the best results for me. It is always easy to return to the original settings when the results are not satisfactory so you can start over again. After stacking, processing and saving the picture in this program you should have a very good result but most people will do a little final tweaking and cropping in Photoshop or similar program.

This concludes my series on how to get started into astronomy and astrophotography. I have tried to keep it very simple and easy to read and understand and have only only touched very lightly on most subject matter. There will be areas that I have not covered well enough or not at all. If anyone has questions or needs further clarification, I would be happy to try to answer to the best of my ability. I will include my email at the end for anyone who cares to contact me. I will continue from here with something that I am really looking forward to by sending in occasional astro photos that I am working on. I will include a general description of the subject in the photo, including where to find it in the sky, the equipment I used and the frames involved in the making of each photo.
Clear skies
Fred Pugh
denali50astronomy2001@yahoo.ca

Close Menu